The Game Boy Advance: a nostalgic gaming device that, for many, harks back to childhood adventures in digital landscapes. Its compact size, bright palette of colours, and a library of over a thousand games have made it a cherished console in the hearts of gamers around the globe. However, time takes its toll, and our dear Game Boy Advance may need a little TLC. If your GBA’s LCD screen is showing signs of wear or has ceased to function, don’t consign it to a dusty shelf just yet. This comprehensive guide will walk you through the steps to replace a broken LCD screen and breathe a new life into your beloved handheld gaming console. But before we get started, it’s important to note that this is not a task for the faint-hearted. It requires patience, precision, and a willingness to get hands-on with your device. So, grab your tools and buckle up for a journey into the intricacies of Game Boy Advance repair!
Understanding the Anatomy of Your Game Boy Advance
Before we delve into the nitty-gritty of replacing a broken LCD screen on your Game Boy Advance, it’s paramount to understand the key components of the device. The Game Boy Advance, a handheld video game console developed and manufactured by Nintendo, comprises several parts. This includes the motherboard, battery compartment, control buttons, speaker, and most importantly, the LCD screen.
Each of these components plays a significant role in the functioning of the device. The motherboard, also known as the mainboard, is the primary circuit board and is responsible for coordinating the functions of all other hardware components in the system. The battery compartment powers the device while the control buttons facilitate game play.
The LCD screen, which stands for Liquid Crystal Display, is arguably the most crucial part of the Game Boy Advance. This is where all the action takes place. If the LCD screen is damaged or malfunctioning, it significantly affects the gaming experience, rendering the device almost useless. Therefore, understanding how to replace a broken LCD screen can breathe new life into your old Game Boy Advance.
Now that we have a basic understanding of the Game Boy Advance components, let’s move on to the step-by-step guide on replacing a broken LCD screen. But before we proceed, ensure you have all the necessary tools and parts. These include a new LCD screen, a Phillips screwdriver, a tri-wing screwdriver, and optionally, a soldering iron.
Disassembling the Game Boy Advance
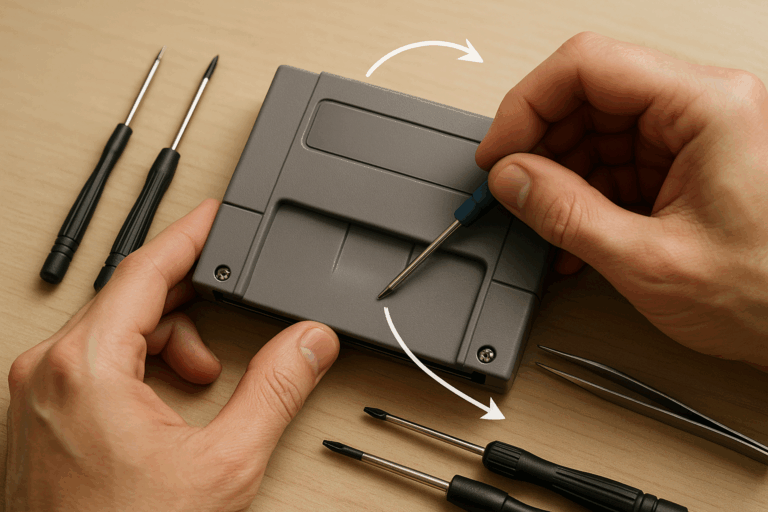
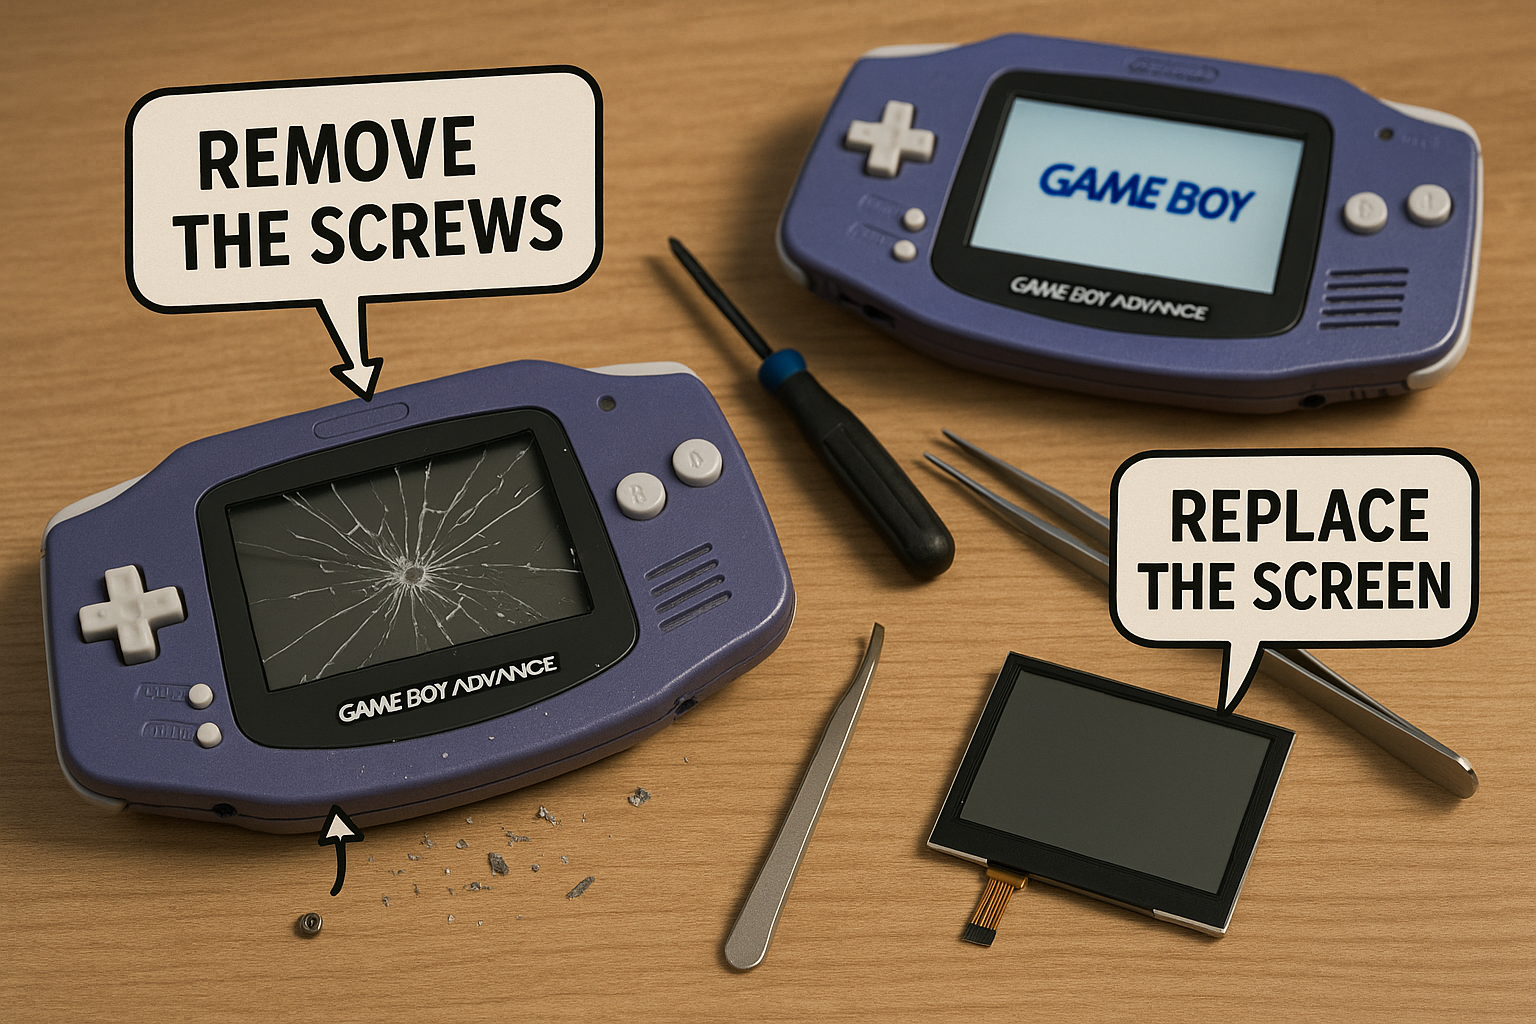
The first step in replacing a broken LCD screen is to disassemble the Game Boy Advance. Begin by removing the battery cover and the batteries. Next, using a Phillips screwdriver, unscrew the six screws holding the back cover. Once done, gently lift the back cover and set it aside.
The next step is to remove the motherboard. Be cautious while doing this as a slight mistake can cause irreversible damage. Unscrew the three screws holding it down and gently lift it out of the casing. You’ll notice a ribbon cable connected to the LCD screen. Carefully unplug it from the motherboard.
After you’ve successfully removed the motherboard, the next component to remove is the LCD screen. Carefully lift the LCD screen from the front casing, making sure not to damage the ribbon cable. If your Game Boy Advance model has a soldered ribbon cable, you might need to desolder it using a soldering iron.
For a visual guide on disassembling the Game Boy Advance, I highly recommend watching the video “How to Disassemble a Game Boy Advance” on the YouTube channel “Fix It Phil”.
Installing the New LCD Screen
With the old LCD screen removed, you’re now ready to install the new one. Begin by carefully inserting the ribbon cable of the new LCD screen into the connector on the motherboard. Ensure the cable is securely in place before proceeding to the next step.
Once the ribbon cable is connected, position the new LCD screen in the front casing. Make sure it fits perfectly in the designated slot. After that, it’s time to reassemble the Game Boy Advance. Place the motherboard back into the casing, making sure not to damage any components. Screw it back in place using the three screws you had earlier removed.
With the motherboard in place, the next step is to reattach the back cover. Align it correctly with the casing and screw it back into place using the six screws. Finally, replace the batteries and the battery cover. If you followed all the steps correctly, your Game Boy Advance should now be functioning with a new LCD screen.
Troubleshooting Common Problems
Despite following the steps correctly, you might encounter some problems. One common issue is the Game Boy Advance not turning on after replacing the LCD screen. This could be due to a loose ribbon cable. To fix this, disassemble the device and ensure the ribbon cable is securely connected to the motherboard.
Another common problem is the new LCD screen not displaying anything. This could be due to a faulty LCD screen or a problem with the motherboard. Test the new LCD screen on another working Game Boy Advance to rule out a faulty screen. If the screen works on the other device, the problem could be with your motherboard.
For more in-depth troubleshooting, I recommend the video “Game Boy Advance Troubleshooting and Repair” on the YouTube channel “The Retro Future”. The video provides detailed instructions on how to troubleshoot common problems with the Game Boy Advance.
Conclusion
In conclusion, this article has aimed to provide an in-depth guide on replacing a broken LCD screen on a Game Boy Advance, taking you through every step of the process, from disassembling the device to installing the new LCD screen, and finally reassembling it.
We started by discussing the different components of the Game Boy Advance, highlighting their significance, and explaining the vital role that the LCD screen plays in the overall functionality of the device. Recognizing this importance, we moved into the practical steps required to replace a broken or malfunctioning LCD screen, aiming to equip you with the knowledge to breathe new life into your device.
We have not only detailed the necessary tools and parts required but also provided a step-by-step walkthrough of the process. From removing the battery cover and batteries to unscrewing the back cover, removing the motherboard, and carefully lifting out the LCD screen, we’ve tried to leave no stone unturned.
We then outlined the process of installing the new LCD screen, taking you through connecting the ribbon cable, positioning the new screen, and finally reassembling your Game Boy Advance. We understand that the process can be delicate and requires precision, and we hope our instructions have been clear and easy to follow.
Of course, we also understand that despite meticulous following of instructions, there can be hiccups along the way. Hence, we provided some common troubleshooting tips. Whether your Game Boy Advance refuses to turn on after the screen replacement or the new LCD screen is not displaying anything, we’ve provided possible solutions to these problems.
We hope this guide has been comprehensive and helpful to you. The process of replacing the LCD screen of a Game Boy Advance may seem daunting initially, but with the right guidance, it is entirely manageable. If you’ve followed this guide, you should now be able to enjoy your Game Boy Advance as if it was brand new again, regardless of its age.
We encourage you to comment on your experience and share this guide with other Game Boy Advance owners who may find it useful. Your feedback is invaluable and will help us improve our guides in the future.
As a final note, remember that with patience and the right tools, there’s no limit to what you can fix yourself. Happy gaming!
For further reading and visual guides, check out “How to Disassemble a Game Boy Advance” and “Game Boy Advance Troubleshooting and Repair” on the YouTube channels “Fix It Phil” and “The Retro Future” respectively.
Remember, “The only impossible journey is the one you never begin” – Tony Robbins.
Until next time, keep gaming, and keep exploring!
For references, see “How to Disassemble a Game Boy Advance” (Fix It Phil), and “Game Boy Advance Troubleshooting and Repair” (The Retro Future) on YouTube.
| Step | Task | Tools/Parts Required |
|---|---|---|
| 1 | Disassemble Game Boy Advance | Phillips screwdriver, tri-wing screwdriver |
| 2 | Remove old LCD screen | Soldering iron (if necessary) |
| 3 | Install new LCD screen | New LCD screen |
| 4 | Reassemble Game Boy Advance | Phillips screwdriver, tri-wing screwdriver |
| 5 | Troubleshoot (if necessary) | Additional working Game Boy Advance for testing (if available) |